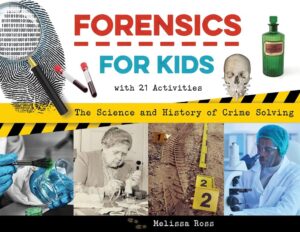
Once in a while, we are asked to review a book and possibly blog about it. Forensics for Kids: The Science and History of Crime Solving with 21 Activities, written by Melissa Ross, is one of those books. This forensic science book is the inspiration for this post. It is a book that we know you will want to add to your classroom and/or home library!
What is Forensic Science?
In a nutshell, forensic science is using science to solve crimes. Forensic scientists use science to find, collect, and analyze evidence that can be used in court.
Why We Like This Book
The author, Melissa Ross, is a former junior and senior high school teacher. She has a good sense of what teachers and kids are interested in.
The book starts with a timeline of forensic science dating from 44BC to the modern day. Each of the 21 activities she has in her book has a historical component to it, which lends itself perfectly to integrating reading and science.
However, you can also jump right into the experiments! Each experiment has a list of needed materials and step-by-step directions for completing it.
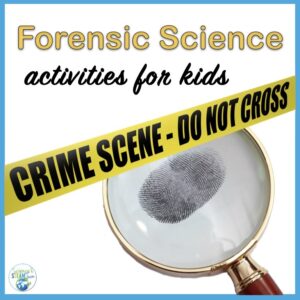
Two Forensic Science Activities Straight From the Book
(permission granted by Bianca Maldonado, assistant publicist)
Did you know that everywhere someone goes, they leave evidence? It might be a fingerprint, a strand of hair, microscopic bits of skin, or bodily fluids. These are the types of evidence that help forensic scientists solve crimes.
Collecting Fingerprints
What You’ll Need:
ink pads
white index cards
olive oil
baby powder
old make-up brush
dirt
tempera paint
tape
How to Collect the Evidence (Three Different Ways)
- Press your thumb onto the ink pad, then carefully press it onto a white index card.
- Press your thumb into a thin layer of tempera paint, then press it onto an index card. Press it several times until you get the clearest possible print.
- Lightly coat your thumb with olive oil until your thumb feels slightly greasy. Carefully press your thumb onto a mirror or glass. Try to keep it as still as possible while removing it. Lightly dust the greasy print you just left with baby powder and let it sit for a few minutes. Finally, use the tape to try and “lift” the print from the glass or mirror. Keep the tape from moving around as you press it onto the print, then lift it off.
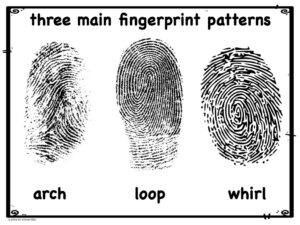
Classifying Fingerprints
Now that you have gathered your prints see if you can classify them. Fingerprints are classified into three major groups. Using a magnifying glass, examine your fingerprints. Compare them to the images above and classify yours.
 Toolmark Examiner
“A tool examiner analyzes marks made on surfaces at a crime scene. Perhaps a window was pried open with a tool. An examiner can discover what kind of tool made the mark and sometimes even trace it to one unique tool. In this activity, you are the tool examiner who will test indented marks, abrasion marks, and hard surface marks.”
What You’ll Need:
Styrofoam plates
small piece of wood
cardboard
Phillips-head screwdriver and flathead screwdriver
a large screw
pliers
wrench
magnifying glass
Procedure
- Lay out the wood, cardboard, and Styrofoam.
- Make three test scratches on each surface at a time using the screwdrivers, screws, pliers, and wrench. First, make an abrasion mark by lightly scratching the surface with each tool.
- Next, make a cutting mark by pressing the tool across the surface.
- Finally, make an indentation mark with each tool by pressing the object into the surface; try pressing the sides of the tool into the surface as well as the point of the tool.
- Allow some friends to examine the marks with magnification. See if they can determine which tool made each mark and explain why they made the choices they did. How accurate were they?
From this small sampling, you can see that kids would be engaged in these activities. There are also so many ways you can use them. The setup can be done by you or students ahead of time. Small groups of students can set up stations and have others rotate through them, etc.
Additional Forensic Science Activities
This video is appropriate for upper elementary, middle school, and beyond students. It does a good job of explaining forensic science. You might want to show it as an introduction.
This website, Kids Ahead, offers crime scene investigations.
So if you have kids that love mysteries, watch CSI (crime scene investigations), or just love science, try some of the investigations in this book!
And remember, it’s all science!


3 Comments
Really a great book for kids to understand how important science is in discovering the treasures of the world.
This book really good for kid to learning and understand how important science in the world and easy learning to
We’re glad you found this book helpful!